
Setting up a safe lane closure shouldn't require a calculator or flipping through an 800-page manual. Whether you are a construction foreman, utility worker, or municipal director, compliance needs to be fast and accurate.
We’ve condensed the most critical federal regulations into a single, free 1-page quick-reference guide. Print it out, keep it in the truck visor, and ensure your crews are protected.
Get Your Free Guide
Instant PDF delivery right to your inbox.
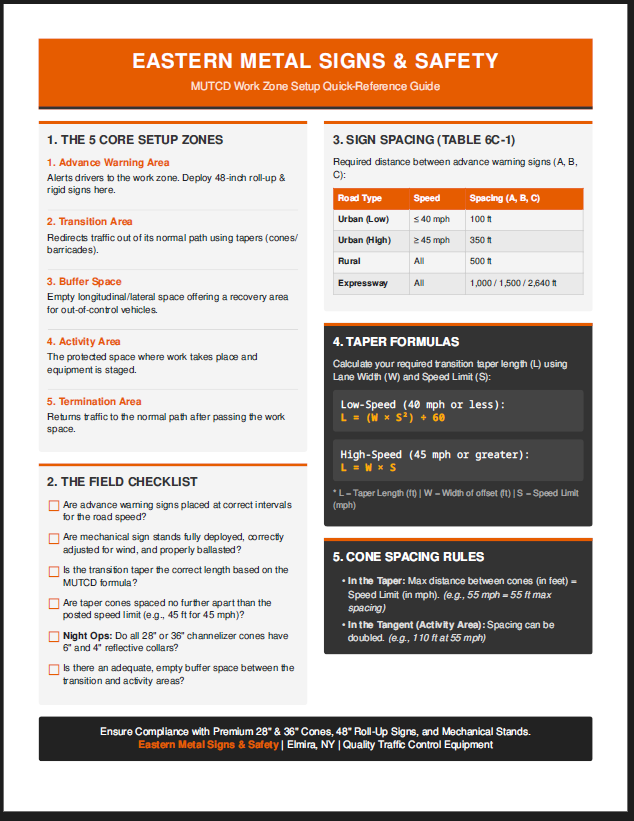
Essential Temporary Traffic Control Guidelines
Every MUTCD-compliant temporary traffic control zone consists of five specific areas. Our checklist visually maps the Advance Warning Area, Transition Area, Buffer Space, Activity Area, and Termination Area.
Sign Spacing Chart (Table 6C-1)
Below is the exact spacing required for advance warning signs based on road type and speed limits.
| Road Type | Speed Limit | Distance Between Signs (A, B, C) |
|---|---|---|
| Urban (Low Speed) | 40 mph or less | 100 feet |
| Urban (High Speed) | 45 mph or more | 350 feet |
| Rural | All Speeds | 500 feet |
| Expressway / Freeway | All Speeds | 1,000 ft, 1,500 ft, 2,640 ft (1/2 mile) |
Frequently Asked Questions About Work Zone Setup
How far apart should traffic cones be in a work zone taper?
According to MUTCD guidelines, in the transition taper, the maximum distance between cones in feet equals the speed limit in mph. For example, in a 55 mph zone, cones should be a maximum of 55 feet apart. In the tangent (activity area), spacing can generally be doubled.
How do you calculate transition taper length?
For low-speed roads (40 mph or less), the formula is L = (W × S²) ÷ 60. For high-speed roads (45 mph or greater), the formula is L = W × S, where L is the taper length in feet, W is the width of the offset, and S is the speed limit.
Engineered for National Compliance
When you equip your crew with the right knowledge and the right gear, you mitigate risk and ensure everyone goes home safely.
Channelizer Cones
Premium 28-inch and 36-inch reflective channelizer cones engineered for maximum visibility in transition and activity areas.
Roll-Up & Rigid Signs
High-visibility 48-inch roll-up signs and multi-panel rigid displays designed for immediate driver recognition.
Mechanical Sign Stands
Heavy-duty hardware featuring proper deployment mechanisms to prevent bracket damage and ensure maximum wind resistance.
